
Feature your business, services, products, events & news. Submit Website.
Breaking Top Featured Content:
DIY Butterfly Napkin Ring
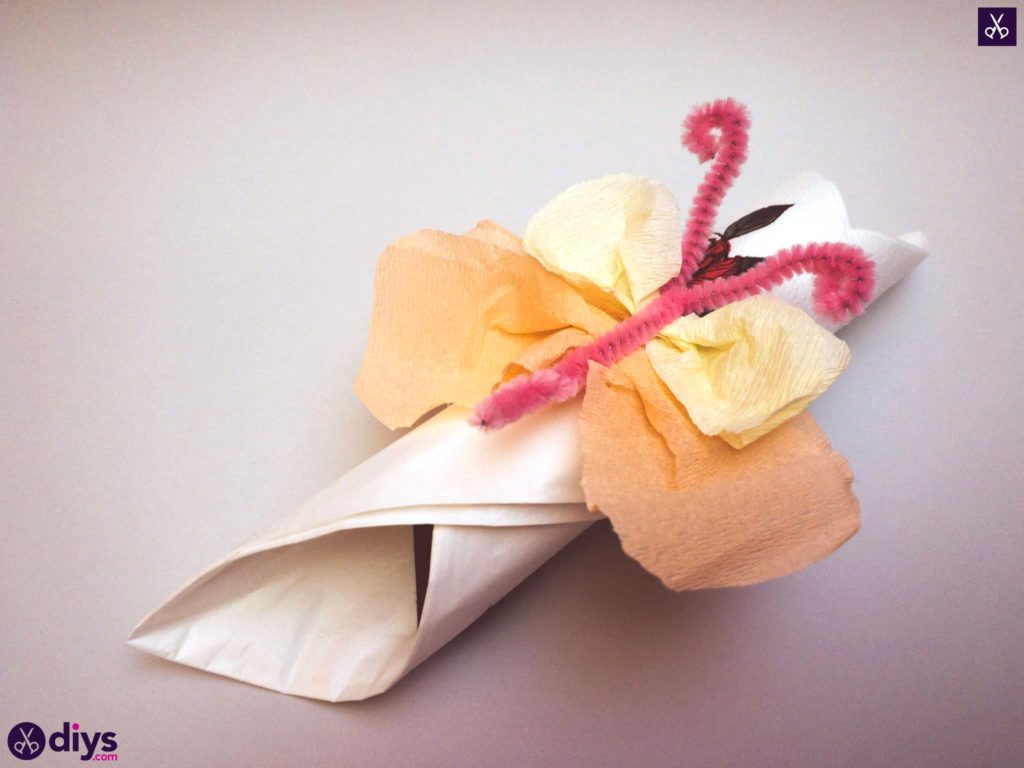
Anyone who knows me will tell you that I love hosting dinners. I will basically find any excuse to not only invite our friends and family over and cook for them, but also decorate the whole table and really make an event out of it, just because. Now I’m learning that I’ve rubbed off my love for hosting dinners onto my kids; they’ve started taking me if they can help make things for our dinner table! That’s how I found myself helping them hand craft butterfly shaped napkin rings recently. The end result was so cute that we decided to outlined the process so that everyone can learn how they’re done.

Check out these photos and written instructions for making a butterfly napkin ring of your very own! If you’d prefer to follow a video, scroll to the bottom of this post to find a full tutorial there as well.
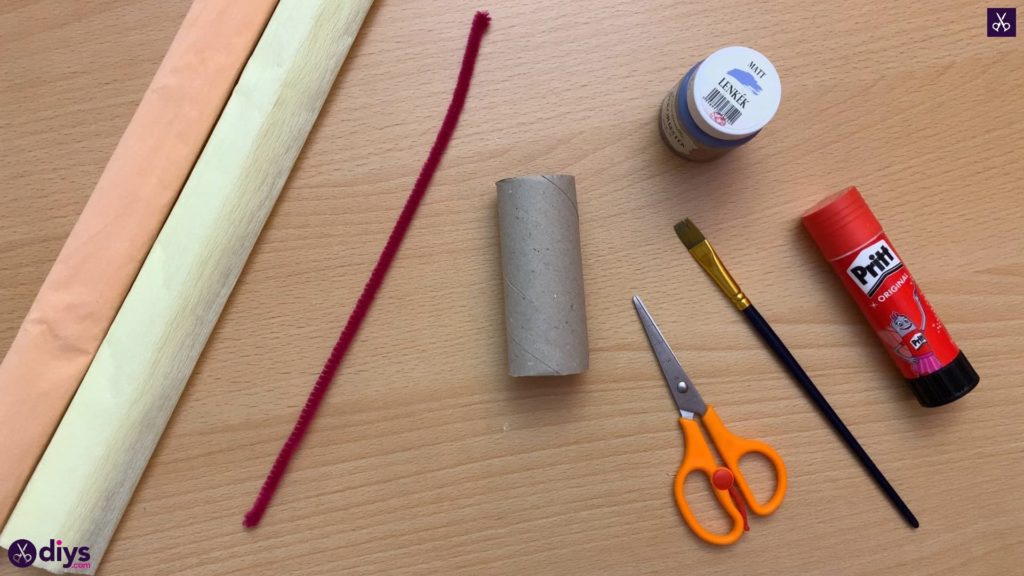
For this project, you’ll need:
- Toilet paper roll
- Blue paint
- A paintbrush
- Scissors
- A glue stick
- Pink pipe cleaner
- Crepe paper (orange and yellow)
Step 1:
Gather your materials!
Step 2:
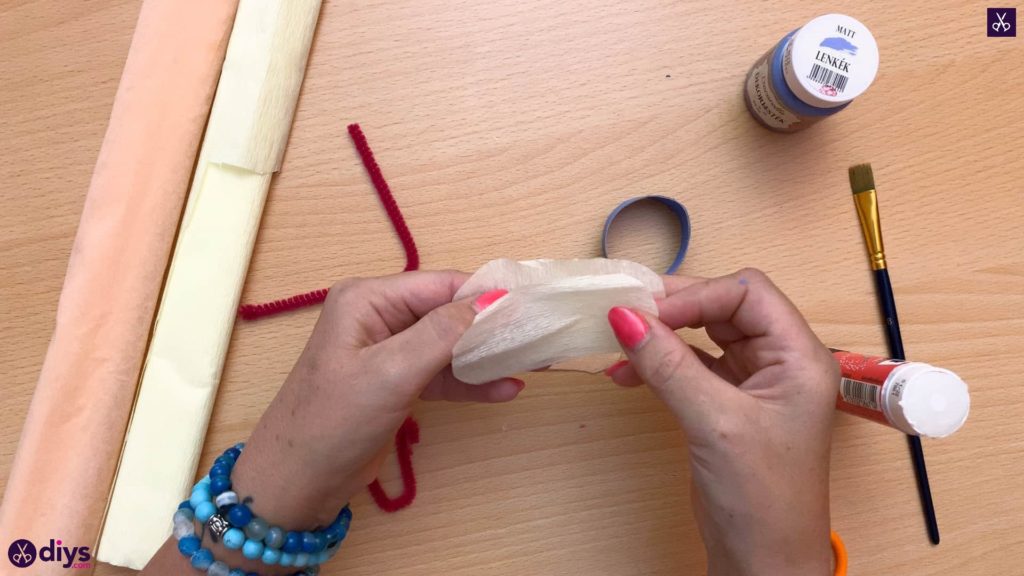
Cut a piece off the end of your toilet paper roll that’s about an inch wide in order to make a smaller ring. This will be the base of your napkin ring.
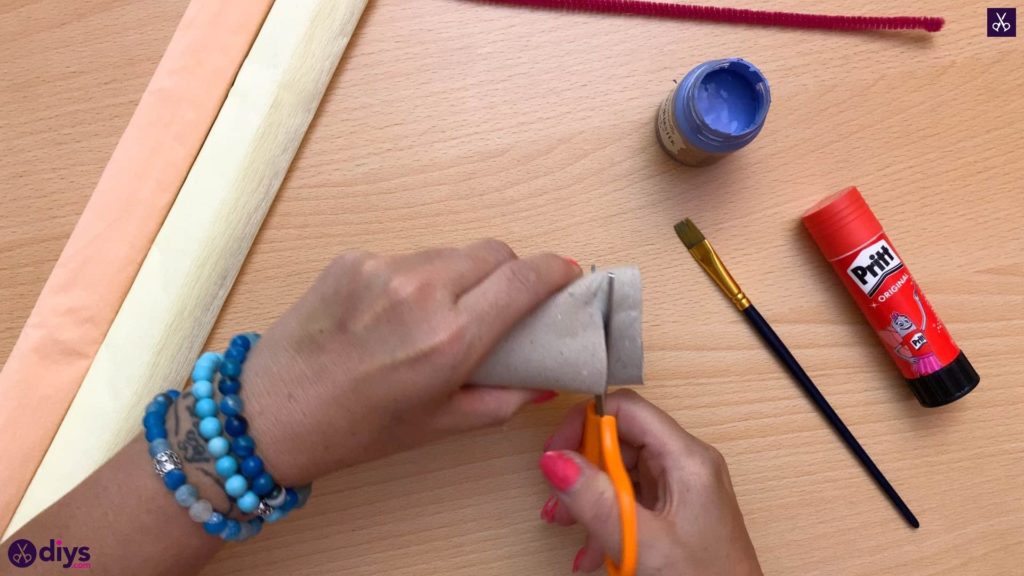
Step 3:
Use your paintbrush to paint your freshly cut napkin ring blue (or whatever colour you’d prefer).
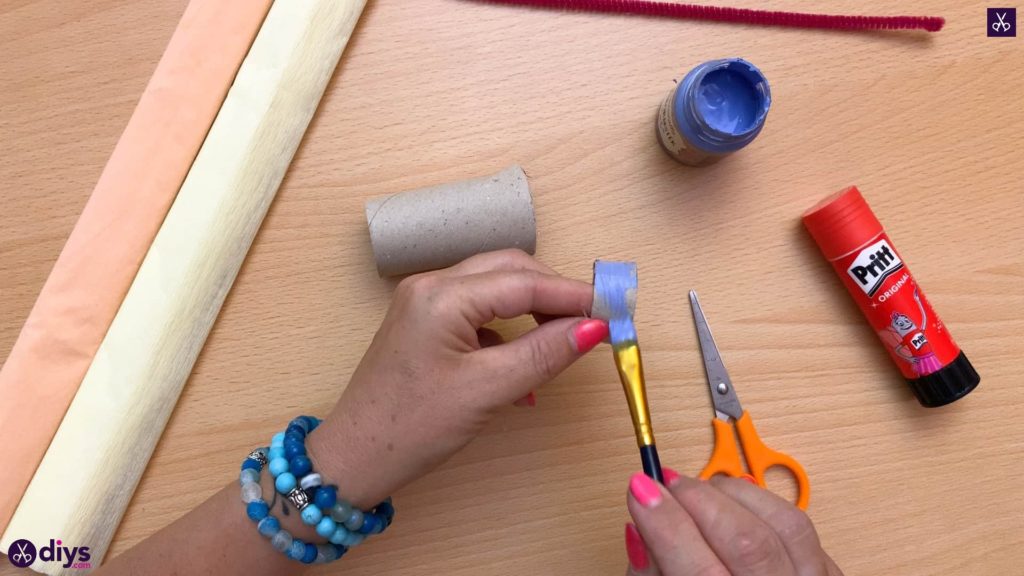
Step 4:
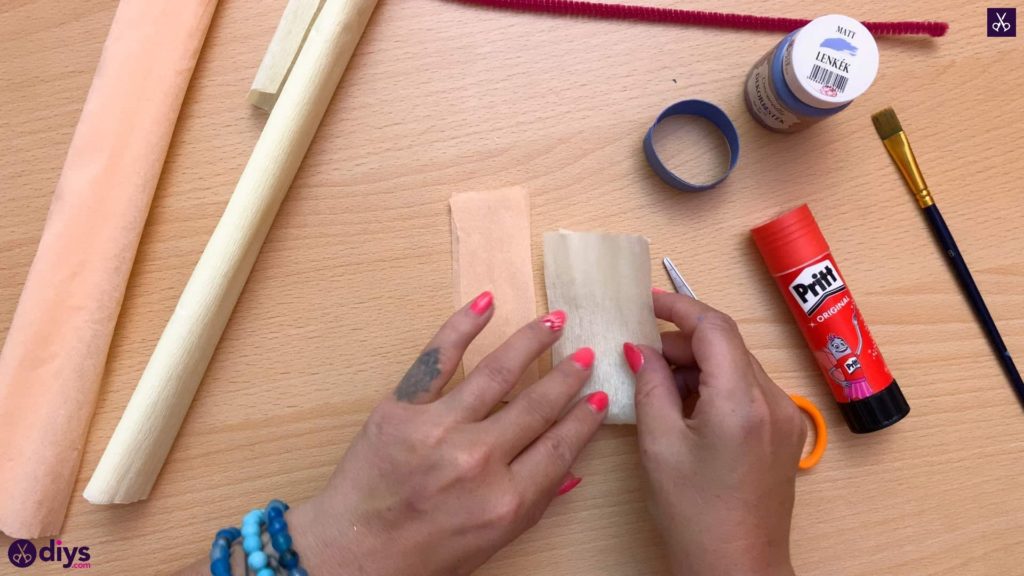
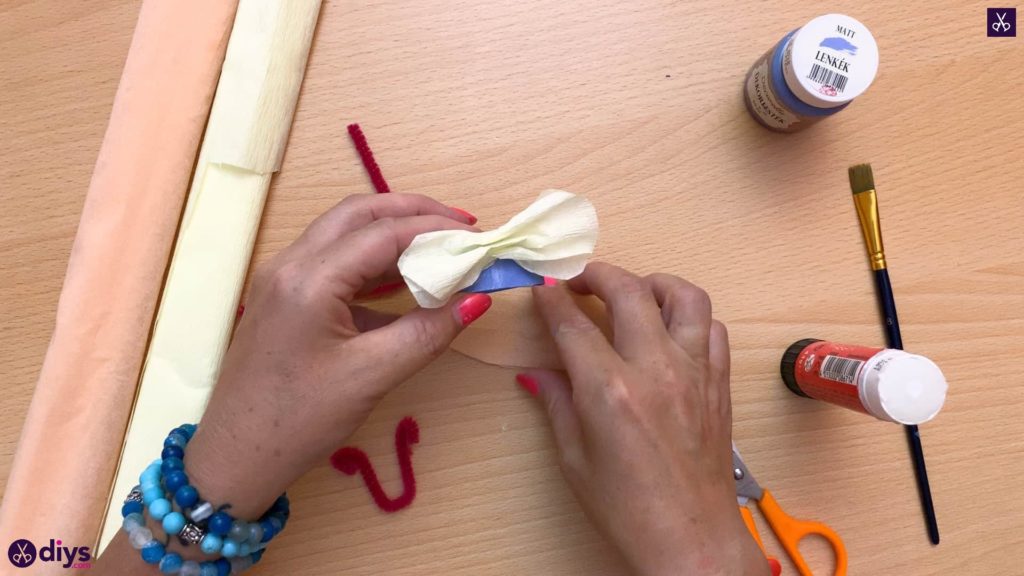
Cut a one inch by four inch rectangle from your yellow crepe paper. Then, cut a similar rectangle from your orange crepe paper. Fold each one in half length-wise.
Step 5:
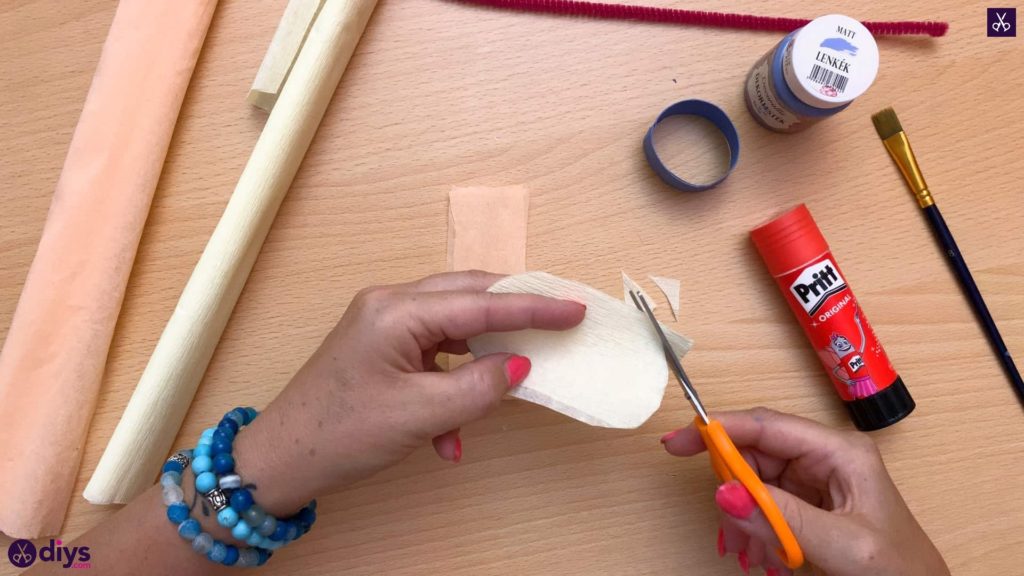
Round off the corners of each of your doubled crepe paper strips using your scissors.
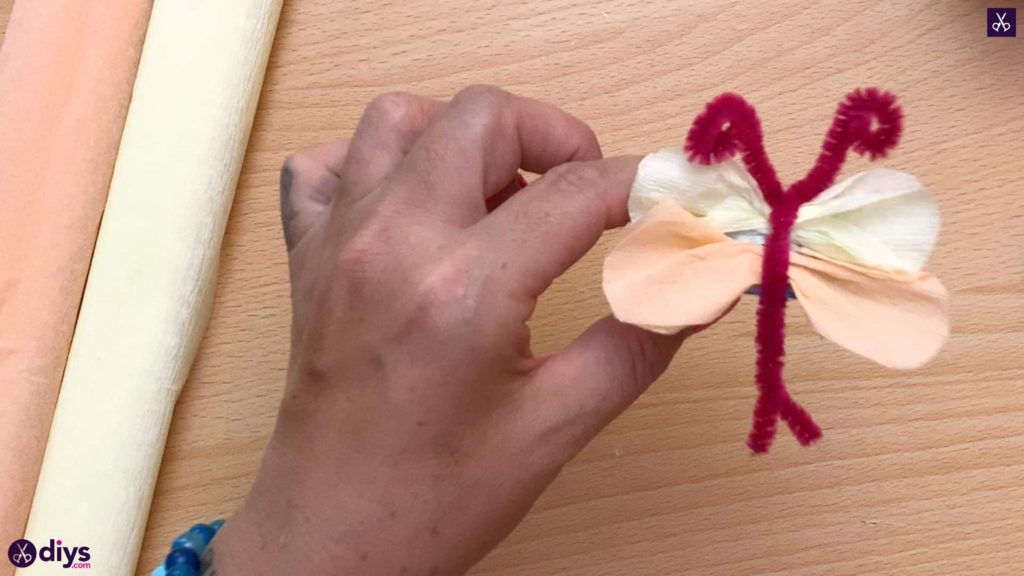
Step 6:
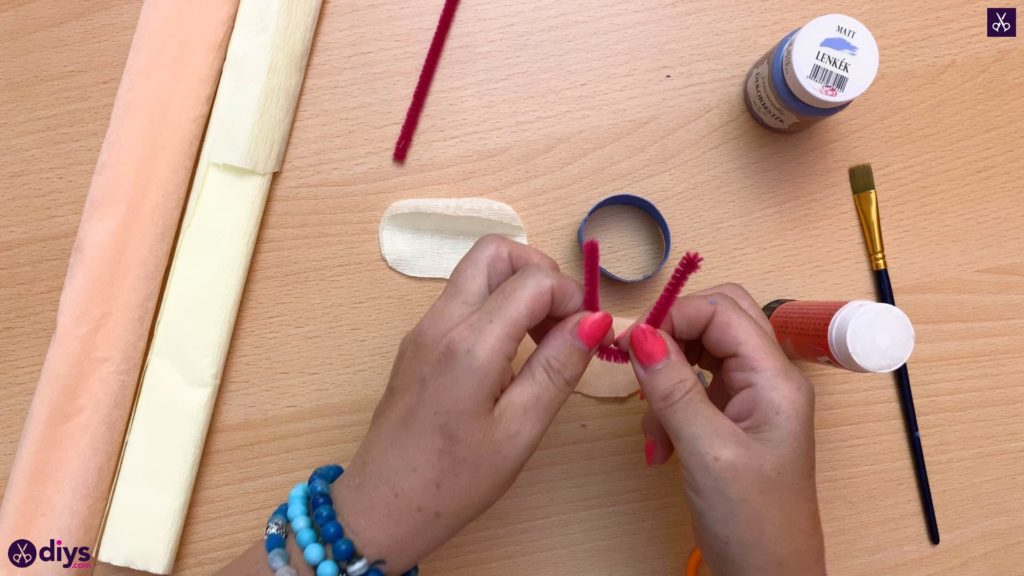
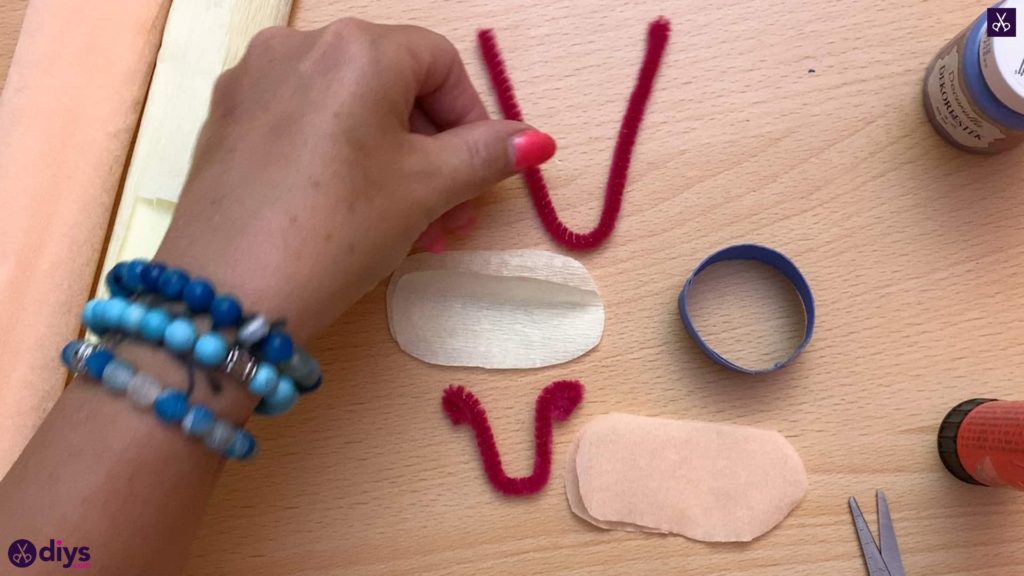
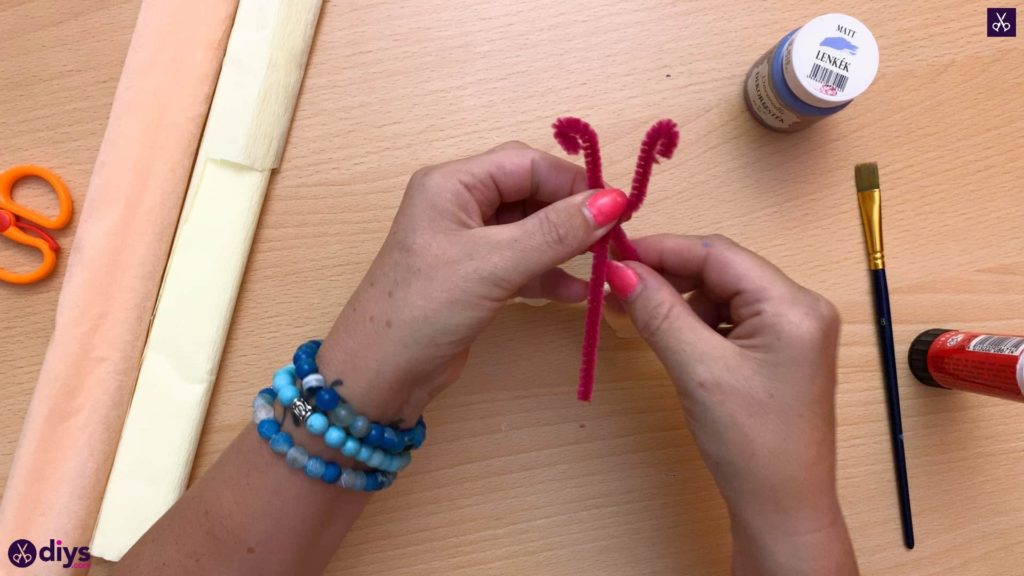
Cut your red pipe cleaner in half. Take one half and gently bend that at the centre so it curves like a U, the curl the ends over a little. This will be your butterfly’s antennae.
Step 7:
Bend your second piece of pipe cleaner into a curved U-shape as well and set it side. You’ll use this to make your butterfly’s body and legs in a moment.
Step 8:
For each colour of crepe paper that you’ve rounded the corners off of, separate the two laters, apply glue on the middle of one, and place the other layer back on top, matching yellow with yellow and orange with orange.
Step 9:
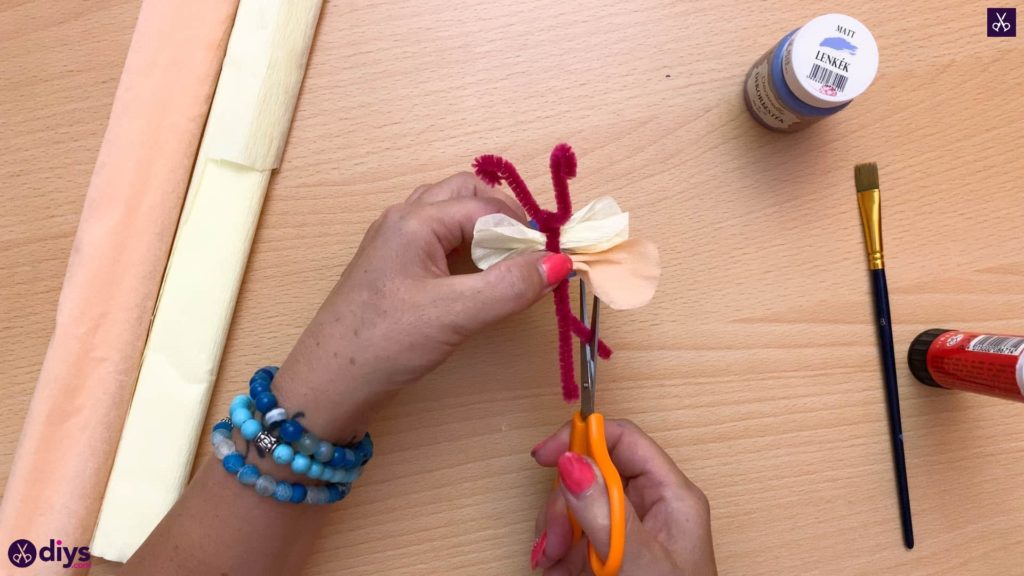
Apply glue on the top surface of your blue ring once it’s dry. Pinch each piece of your doubled crepe paper in the centre so it cinches in the middle and expands towards the ends. Press the pinched centre of each one into the glue, one above the other.
Step 10:
Hook your U-shaped pipe cleaner pieces onto each other so they meet at the centre with their legs going in opposite directions. Twist the piece that does not have curls on the ends (i.e. the body piece), attaching the two at that spot.
Step 11:
Place the napkin ring with its crepe paper pieces between the pipe cleaner legs that you just twisted so that one sits overtop, across the pinched centres of the paper, and one sits underneath, through the middle of the blue ring. Twist the two red pipe cleaner pieces around each other on the other side so they close around the ring and then, after several twists, trim each end so your butterfly has two little feet.
You’re all finished! Just in case you’d like to try this project out for yourself, here’s a fantastic tutorial video to help you!
The post DIY Butterfly Napkin Ring appeared first on DIYs.com.