Feature your business, services, products, events & news. Submit Website.
Breaking Top Featured Content:
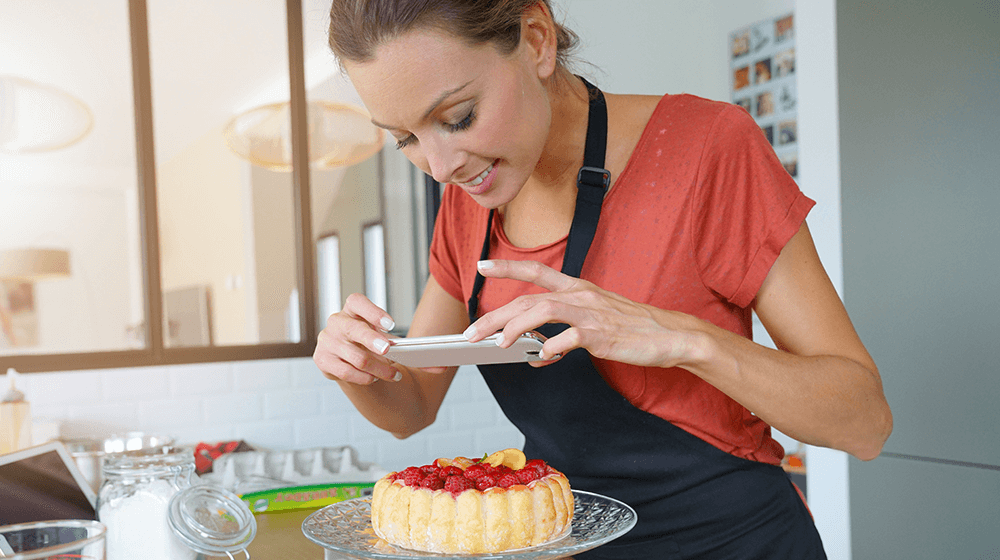
How to Take Food Photos for Instagram and Websites
Food photography can be an incredibly lucrative skill to help you set apart and specialize in a growing niche. With social media and websites dominating the marketing space, strong food photography is crucial for setting brands apart and creating an impression for customers. To help with this, we’ve created a definitive guide to food photography with the best food photograph tips so that you can take the best photos for Instagram and websites as part of goods and services pictures.
22 Professional Food Photography Tips and Tricks for the Perfect Shot
Food photography isn’t just for professional photographers! Whether you are a food blog owner, social media influencer, hobby food photography, or a small business owner, these food photography tips can be incredibly beneficial for boosting your visibility and carving out space for yourself. We’ve put together some top food photography tips to create the perfect food photograph, and anyone can do it. In addition, once you master this type of photography, you’ll be able to offer your services for social media marketing such as Instagram and help with websites and other channels where visual content is needed.
1. Take Multiple Shots During Shoots
One angle is just never enough when it comes to food photography. Taking multiple shots of the food ensures that you can capture the depth and richness of the food and get in all the details.
Remember that having more options to choose from after the shoot is always better than not having enough, and it’ll make decision-making that much easier.
2. Use iPhone Settings Correctly
Your iPhone camera is a powerful tool for photography, which is why it’s crucial to have your settings done correctly. This also applies to other phones such as Androids, and having your settings changed ahead of time will ensure a smoother photography experience.
Here are the key phone camera settings to take note of:
Do Not Zoom Manually:
Manual zoom may make it difficult to get the right angle and shot you want as it might not be as sharp or in focus as you would like. To ensure high photo quality, step ahead or closer to the object rather than using the zoom tool.
Use the Grid Setting:
The grid setting is instrumental for getting the right angles and ensuring your shot has the right composition. Make sure to keep the grid setting turned on so that your photos have a consistently great touch.
The Exposure Slider:
Adjusting exposure can help you get the best angles and lighting to make the food really stand out in the photograph, especially in locations that are too bright or too dark. Tap on a point to focus the camera, and then swipe up or down to adjust the exposure accordingly.
3. Use Camera Settings Correctly
Even if you’re not using an iPhone camera and opt for another kind of camera such as DSLR, the point about settings is still crucial. There are many simple tools and settings you can adjust to improve the quality and composition of your photos dramatically.
Tripod: A tripod can be a great tool to ensure that your photos aren’t blurred or low-quality since the camera stays stable and you can focus the shot correctly. Tripods are widely available across various price points, so it’s a simple addition that makes a big difference.
Shutter Speed: Shutter speed refers to the measurement of time that the camera shutter is open. This is usually shown in seconds or fractions of a second. A faster shutter speed can help improve the photo quality and leads to a sharper image overall. You might have to experiment with different shutter speeds for your camera to understand what works best, but it’s worth spending some initial time doing so to ensure photos come out well.
Aperture: Aperture is what controls how bright the image is as it passes through the lens and onto the image sensor. Smaller apertures lead to less light passing through the lens, while larger apertures will have more light passing through the lens. The right aperture can help with reducing overexposure and that your photography has balanced lighting. You can control the aperture through the f-number and try a few different f-numbers to see what leads to the best photos.
Manual Mode and RAW Format: Most cameras allow for options other than JPEGs, such as RAW format photos. The RAW format is important since it hosts all the data captured during exposure. It can be edited in many ways and converted into a JPEG, thereby leaving the RAW file itself unaltered and giving you more flexibility.
4. Pick the Right Angle
The angle you choose for your photo can make a major difference in how the shot comes out. Therefore, it’s important to look at every option and try different angles to see how photographs are coming out and what is working well. If you’re not sure what the right angle is for your photograph, here are some options:
Shoot from Overhead: An overhead angle is always great if you want more depth in your images and show off a big meal with many different elements. Food images with an overhead angle can look great to give viewers an idea of what the entire meal looks like.
Shoot Up Close: If the meal has many small details, such as herbs, garnishes, and other little touches, then close angles can make for a better shot. You can move the plate around and take close-ups to see what works best for the shot.
5. Master Tripod Settings
While tripods may seem relatively straightforward, setting them up correctly can make a big difference to your images! Taking some time to gain some knowledge around tripods and how they can work for your photos can make a huge difference in the final results. Tripods can be set at different heights, and it’s always good to ensure the camera is correctly balanced.
Always double-check the background of the shot to ensure that you are capturing everything that needs to be photographed, and do a few test shots beforehand to make your tripod set upright.
6. Create a Food Story
A food story can be a great way to show off the meal in more detail, educate others, and bring a different kind of visual appeal. For example, when making a food story, you can deconstruct the ingredients and show them off one-by-one, or create recipe-like visuals to show others how to make the meal and the ingredients that go into it.
A food story can be a particularly popular option for social media platforms such as Instagram since it’s a way to visually engage users and create compelling content to entice others to try the dish. In addition, restaurants and chefs often opt for food stories, making it an appealing option for food photographers.
7. Consider Lighting for Food Photography
Lighting can make all the difference when it comes to photography, and food photography is no exception. Having the right lighting can make a difference in how the food looks, the composition of the photo itself, and its visual appeal. A hero item, in particular, should always be well lit! So we’ve put together some crucial tips to help you master lighting for your food photos.
Natural light (Window Light): Natural light is always one of the most popular options for a photo, especially on Instagram, for good reason. Natural light near a window can also help with depth of field since you’ll want to blur out the background and keep the focus on the food itself.
No lighting from the Front: If the light source is directly in front of the food item, it can lead to a less clear and visually appealing photo. Avoid using front lighting as it can distort the image, and it may not be as accurate of a reflection of the food item.
Reflected Light: Reflected light can be helpful when you’re trying to capture different elements of the food item by reflecting light off the object. You can position foam core boards or a white foam board in front of light sources to create a reflector as a bounce light source.
Diffused Light: Diffused natural light tends to be one of the best options for creating beautiful food photos, placing objects between the light source, such as sheer curtains from a natural light source, and the object itself to create more texture and depth.
Artificial Light: For dimly-lit spaces or where the lighting just does not quite work, artificial light can be a solution. You can use light sources such as ring light can be a helpful addition to make your food photos pop and add more detail to the shot.
Use of a Lightbox: For detailed product photography and more control over light and other elements, a lightbox can be extremely useful. A lightbox is a portable table-like photography tool with adjustable LED lighting. You can place the lead item onto the lightbox and adjust the lighting as needed for photos.
While lightboxes are available, you can also create your own photography lightbox by constructing a box shape using foam boards and adding different light bulbs to achieve different effects. This will help you achieve different looks with food products and experiment with lighting to help you get the best photo possible.
8. Use Shadow Areas Correctly
Shadows help add more depth to a photo and help improve the image’s overall texture and composition while also highlighting details of the object. You can create shadows depending on where the light source is placed in relation to the food item you are photographing.
If you consistently see harsh, dark shadows in the photos, you can soften them by reducing light or use a white reflector.
9. Think About Food Color
Colorful dishes tend to have a lot of visual appeal, especially on platforms such as Instagram. Therefore, a colorful dish is always sure to get attention, such as a salad with many ingredients, or even dishes such as ramen or hero items that include many different ingredients.
If you really want colors to pop, consider using backdrops such as baking paper or parchment paper for a neutral touch that makes the dish’s colors look more vibrant in photos.
10. Think about Food Photography Backdrops
While baking paper or parchment paper can serve as one type of backdrop, there are many other options available, too, when it comes to photography backgrounds. The main rule of thumb for choosing a backdrop is to go for something neutral and won’t clash or take away focus from the object itself. Some options include:
A Natural Background: Natural backgrounds are always great if you’re going for more authentic photos and want to capture the atmosphere just as much as the food. You can always arrange items against different backgrounds within the same natural setting to see what works best.
A Table cloth: If you would like to elevate your photos a bit and add a bit more drama, then this tip is for you. A table cloth is always a solid option for food photography. You can go for patterned tablecloths such as gingham or check for a more summery, picnic feel or a solid color such as white or black to highlight the food.
11. Consider Food Photography Setup, Arrangement, and Placement for Fantastic Results
A photo is more than just the food itself; but it’s also about how the shot is set up, the colors, arranged, and food placement. When these three elements come together cohesively, there is an opportunity to create fantastic images that customers and clients will love. Setting up food correctly, from angles to backdrops, is all part of the process.
Food Plating: Any good chef will tell you that we tend to judge our food by how it is plated before we taste it. That’s why choosing the right plate and arranging it correctly is important. For example, use a dinner plate when it’s dinner or choose an appropriately proportioned bowl for items such as ramen and soup that display depth and other elements.
Start in the Middle: Certain dishes can look better from an overhead, middle shot rather than from afar. Arranging your photo to photograph the middle of the food rather than the sides can make the photo more interesting and attract attention to the way the dish is crafted.
Stand In Food: While ideally, everyone wants a totally natural photograph of the food item, this is not always possible for various reasons. For advertisements and higher-end photoshoots, you can choose to use hero food, which is a stylized end product that is prepped beforehand solely for photos.
Framing the Subject: Think about how your food item is framed and what objects are surrounding the food itself. You can use props and other items to make creative frames for the food, such as herbs and flowers or dinnerware to create interesting shots.
12. Use Composition Rules
Photo composition is a vital aspect that must be taken into consideration in any kind of photography, including food photography. You can add different elements to make the composition stand out and make your photos more visually appealing for social media.
Photo composition refers to the way the elements of the photograph are arranged, so there needs to be a balance between the items, how the food is arranged, and the props or other elements used.
Composing Images with Layers: Layers add more depth to your food photos and make perfect shots if executed correctly. Think about the background, making it more three-dimensional, and create the illusion of depth by choosing an interesting foreground and background for your subject.
13. Consider Photo Space
If a photo is too cramped or there is too much going on in a small area, it can be very overwhelming to the eye. But if it’s too empty, it’s hard to draw focus to the food item and makes for a less compelling image.
Consider the space around the food item and between the composition elements. Try different spacing and how much distance to add to create a photo that draws the eye and creates the illusion of motion.
14. Keep Things Simple
Taking up the previous point further, remember that simplicity is key. Every element of the photograph is completely in your hands, so always start small and work your way up.
The food should always be the focus, and creating simple, yet appealing imagery should always be the objective. Start with easy and simple elements and add as needed – after all, everything in the photo is a decision that ensures the food is always the star of the image.
15. Expose the Image Highlights
Exposing image highlights essentially means underexposing a photo. Doing so makes it easier for viewers to see small details in the photo, and it can bring out a new level of depth in the image.
It can make post processing and editing easier and balance the lighter and darker areas of the photo. You can expose for highlights by adjusting your camera’s aperture, as it will help you capture the dynamic range of the photo.
16. Be Creative
Food photography has become increasingly competitive, which is why standing out is so vital. The best way to stay ahead of the competition? Be creative!
Try different angles and backgrounds during the shoot and look at editing and other post processing options such as brightness, contrast, exposure, filters, and other edits to create truly beautiful food photos that social media users and restaurants will love. Look at other food photography images to get inspired and learn new ways to be creative. You can also get images from Fiverr photography as a final product or one you can edit to make better.
17. Use Decoration on the Dish (Fresh Herbs and More!)
Decorations and props can help enhance the background and composition of the image and help make it stand out. For example, dish preparation is one of the primary attractions in a food photograph, so adding extra elements and colors can help it look more appetizing and appealing can make a big difference.
You can add a sprig of fresh herbs such as rosemary and thyme, condiments, salad garnishes, and much more to decorate your plate before the shot itself.
18. Add a Human Element to the Image
There is no doubt that social influence plays a huge role in how we perceive photographs and images, particularly an activity such as eating. Including human elements in the photo can make it more personal and makes it easier for people to visualize themselves with the meal.
For example, you could take a photograph of friends enjoying burgers with more focus on the burger or have people in the background of a photo to show the venue’s ambiance.
19. Capture the Food Creation Process
Another aspect of food photography that many love is seeing a behind-the-scenes look at how the dish is created, the ingredients that go in, and getting a better understanding of the process. This helps customers and social media users connect more with the dish, and it tends to garner more interest as well when they see how complex or simple it is.
Photos and videos of baking or creating a simple dish such as a salad or a sandwich, or something more challenging can be a cool way to show off the uniqueness of a dish.
20. Use Food Photography Props (Ingredients, Utensils, and More!)
Alongside decoration on the dish itself, you can also use food photography props to add more dimension to your image and create truly unique images. Props can help make the photo feel more real, and they can be very useful in establishing a connection with the viewer. Food photography props can include:
- Cooking utensils such as spatulas, serving spoons, pots, and pans
- Cutting boards made from wood or other materials
- Marble slabs
- Napkins in different colors
- Bowls and plates
- Serving dishes and bowls
- Tableware and cutlery
- Colorful plates and bowls
- Unique trays
- Neutral or colorful tablecloths and linen
21. Become a Pro Photo Editor, Enhance Colors and Create Flawless Photographs
When it comes to photography, it’s not just about the shot itself but also about the editing. The way you process photos after they have been taken and the types of editing done can significantly impact the final product.
It’s crucial to choose the right tools for editing, such as Adobe Photoshop and Lightroom, and also take some time to learn more about enhancing colors, filters, presets, and other editing elements that can help you create consistently flawless images. It is also worth mentioning there are Instagram photo apps to help you create a more professional image.
22. Optimize the Images
Now that you have taken the shot, you have spent some time editing and getting the best photo possible; now, it’s time to optimize. Most social media platforms have specific requirements when it comes to the image size, its dimensions, and other considerations. For both platforms, the image should align with the brand image and aesthetic already set and should complement other posts. Here are some key considerations for optimizing the image:
Resize the Image: Remember that Instagram has different dimension requirements compared to Facebook. You may need to crop the image more for Instagram to fit the grid or opt for a larger size to fit a Facebook post.
Compress the Image: Generally, RAW files tend to be far too large to upload on social media. To make the process easier, it’s far better to convert image files into JPEGs and compress the image further to upload easily without losing out on image quality.
Food Photography Editing Tips for Even Better Food Images
Editing food photographs is an integral part of food photography, and decisions made for post processing can impact the end result. In order to have the best photos possible, here are some editing tips for photographers to ensure images come out great:
Use Photo Editing Software
Many photo editing software is available at different price points depending on your needs and level of expertise. The most popular option by far is Adobe Photoshop and Adobe Lightroom, which can be helpful for more thorough editing of contrast, brightness, shadows, and exposure levels. If you’re looking to edit on the go, you can also download apps such as VSCO for quick editing on your phone.
Master Color Enhancement
Because colors are such an integral part of how we view food, mastering color enhancement can greatly impact the overall effect of your photos to bring out the real depth in food items. Using photo editing software, you can hone your skill as a food photographer and use photo editing software to try different color enhancements during post processing for even better photos.
Use Image Saturation
Another aspect of food photography tips is image saturation, as that can also make a big difference to the end photograph. Image saturation refers to the intensity and purity of the colors in the picture, making it deeper or lighter as needed for desired effects.
Image saturation for a food photograph can bring out details and make the shot more vivid. You can use photo editing software to achieve image saturation and play with levels to get a great picture.
Control Image Radius with Filter
Depending on the image, you can use a filter with a specific radius around or on the item to get more depth and texture in the photo and bring out details similar to image saturation. You can control the image radius using a filter and use this technique to greatly improve and enhance your photo.
Understand White Balance
White balance refers to the color temperature in your photo and provides a sense of balance so that colors are not too saturated and the image does not look too heavily edited. Using photo editing software, correcting white balance can take out unrealistic colors and bring a more natural look and feel to the photo.
Best Camera for Food Photography
There are many fantastic camera options available for food photographers. While the popular choice is a DSLR camera, some other best camera types include the Panasonic Lumix S5 and Sony A7R IV, as they offer stunning resolutions and high-quality photographs.
Best Lens for Food Photography
A lens is an important piece of photography equipment that can help you get the level of detail needed for the best possible image.
The best lens for food photography include:
- 50mm
- 70 mm
- 80 mm
- 85 mm
- 90 mm
More Food Photography Resources
If you’re looking for additional food photography tips, here are some other fantastic resources to help you improve your food photos:
- Food Photography Academy
- One-Click Food Photography Presets for Lightroom.
- The Food Photography Book
- Local photography classes
- Foodtography School
- Youtube tutorials, such as this one by Skillshare
- Food photography course for beginners
- Food Photography: From Snapshots to Great Shots
How do I photograph food at home?
You can photograph food at home easily with a few simple tools such as a DSLR camera, some props, and some natural light from a window. Alternatively, you can take photographs of food at home using equipment such as a lightbox.
What do you need for food photography?
For food photography, you will need a good camera such as a DSLR, a lens, a source of natural light, and/or artificial light such as a ring light, as well as props and decorative elements to add an extra touch to your photos.
How can I make my food look good in pictures?
You can make your food look good in pictures by keeping photos simple, using props and dish decorations to make the food look more appealing, and using natural light and neutral backgrounds to make the food stand out.
How do you post a food picture on Instagram?
You can post a food picture on Instagram using the following process:
- Take a food picture and edit as needed
- Save the picture onto your camera
- Open the Instagram app and tap the + button at the bottom of your screen
- Select your photo and post to your feed, adding any last-minute edits you feel might be needed.
How can I get better at food photography?
You can improve your food photography by using the following tips:
- Keep your photos simple
- Use natural light or artificial light as needed to show the details of the food.
- Think about the food item and its setup, arrangement, and placement
- Use props, decorations, and backdrops creatively
- Take your time in post processing to enhance colors and improve image saturation.
What is the best lighting for food photography?
The best lighting option for food photography tends to be natural light, particularly from a window. However, if that is unavailable, you can also use artificial light sources such as a ring light. Other options can include reflected light and diffused light.
What camera settings should I use for food photography?
There are a few different camera settings to use for food photography, such as:
- Using a tripod
- Adjusting the shutter speed
- Adjusting the aperture
- Correcting the exposure
- Using manual zoom and grid settings on phone cameras
Is a 50mm lens good for food photography?
A 50mm lens is very good for food photography as it can capture quite a bit of detail and lead to a high-quality shot. 70mm lens and 85mm lens are also good for food photography.
How much do food photographers make?
Food photography wages can vary based on experience and knowledge, so it’s often difficult to find an average for how much food photographers make. Generally, it can vary between $29,000 a year to $44,000 a year, with more experienced photographers commanding more.
Image: Depositphotos
This article, “How to Take Food Photos for Instagram and Websites” was first published on Small Business Trends